At dfirst I just thought of covering the model with sheets of the cardstock, but, on further consideration, I decided to plank the model with strips of cardstock.
Madness, you say! But what a wonderful madness it is!
Behold!

simple tools, but set to a dark and insane purpose they look sinister indeed

the first step is to make the strip stock,
the index card makes this easier as you can just cut along the lines

then wet the area to be worked on,
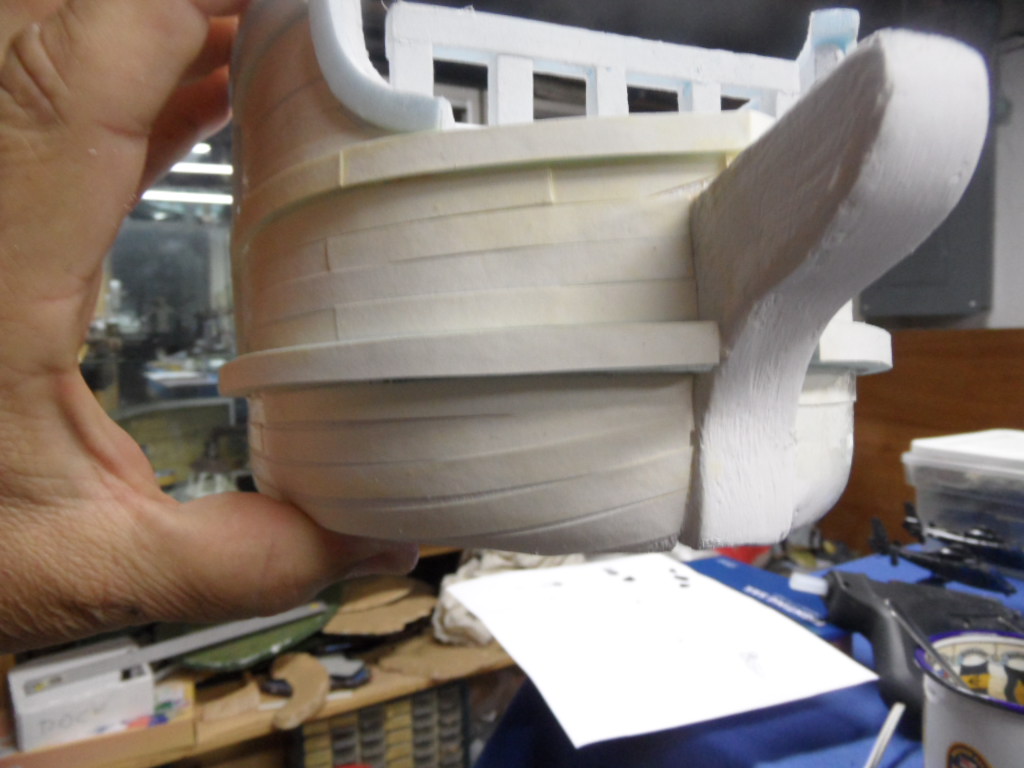
this would have been a great deal easier if I had decided to plank
the hull BEFORE the gunwales and trim were added

add a bead of wood glue

and spread it around with a soft brush

trim the ends to fit before installing
as they will be wet and difficult to cut later

I started with the plank just above the gunwale

paint the diluted glue over the outer surface of the plank as well

keep adding strips as you go forward, trimming to fit as needed

keep the glue moist as you add more strips

I filled in one area at a time,
if you are working on an untrimmed hull I would suggest starting
at the line of the main deck and working stern-to-bow,
then moving to the upperworks first and then the lower hull

I allowed some strips to overlap to enhance the appearance of the planking,
on a real ship these joints would be flush and caulked then painted such that they are nearly invisible

some pieces had to be cut to fit, again,
if you are going to plank your hull do it before adding trim

small pieces can be "floated" in the glue mixture
and coaxed into position with the tip of the brush

it took me about an hour to do one side of the model

I am not really sure that it needed the additional strength but I am liking to look

now I am thinking that I need to go back and do the other models as well,
Somebody Stop Me!

yeah, this could be trouble

close-up

after the cardstock has dried for a but add another coat of glue over the top of everything.
this will make the surface very strong
of course it didn't occur to me to allow the planking to curve upward
at the bows until I got to the other side of the model
this is the more realistic look,
it also meant that I had to go back and peel off the first batch of planking and re-lay it

but it DOES look so much better

so the old planking came off

and new planking was added that curved correctly

each plank curves more than the one above it, this is the result of trying to cover a surface that curves in both directions with a plank that can only curve in one at a time

attach the plank to the side of the hull a few inches back and then pull it forward to the bow,
trim to fit snugly against the stempost

as you work your way down to the waterline
you will have to trim the lower edge of the plank as well

and carefully glue it to the hull before wrapping it to the bows

but it does look a lot better,
it took me about three hours to plank the model, a solid hour of that was carefully cutting strips of card from the index cards before I started doing the actual planking
again, this would have been a LOT easier if I had possessed the sense to do the planking before I started adding the gunwales and trim, but hindsight is always 20/20

and a snap of the Fort Matanzas model trying to match the photo of the real thing on my masthead
In reality, this is not that difficult and as a matter of time you could reasonably skip the multi-step sanding and filling process displayed in Part IV as the planking will cover all but the most heinous of flaws in the shape of the hull. The choice is yours.
I was wondering if (and how) you were going to plank it after previous tutorial... Now I know.
ReplyDeleteAlmost forgot to add: both the ship and the fort look amazing. Excellent work.
ReplyDelete